Android - Configuring MFA
Before you start
- Follow each step carefully.
- Watch for stop signs and switch between your computer and phone as directed.
- Skipping steps can cause setup problems.
Step-by-Step Instructions to Set Up MFA using the Microsoft Authenticator app on Your Android Device
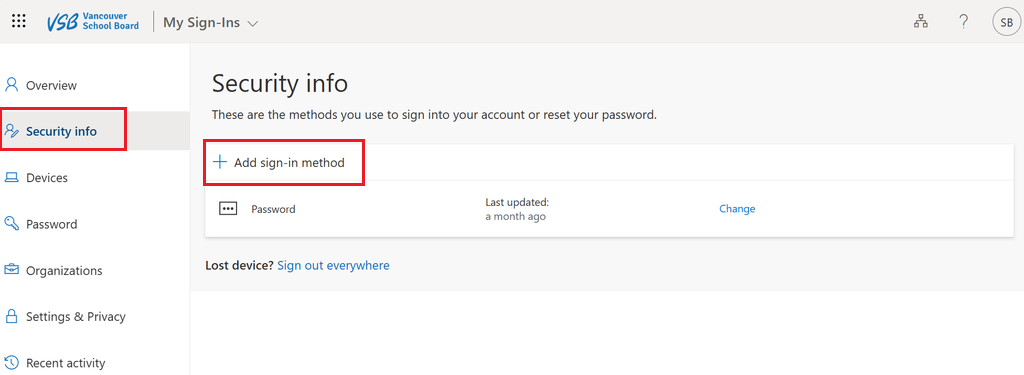
Step 1
Please visit My Sign-Ins from your computer. Select ‘Security info’. Click ‘+Add sign-in method’.

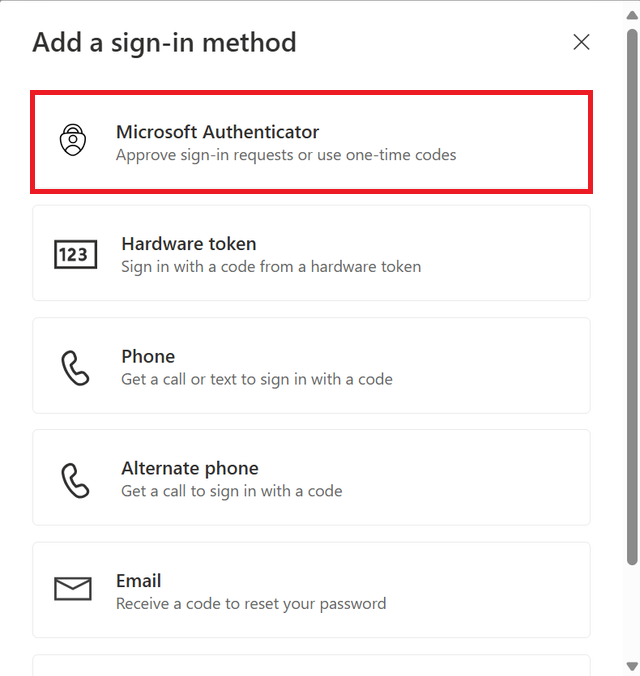
Step 2
Select ‘Microsoft Authenticator’.
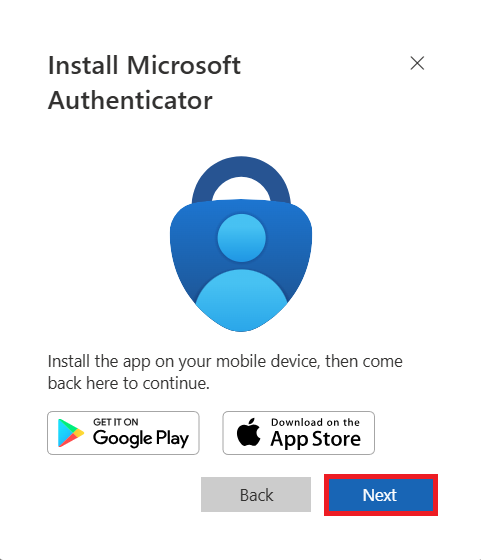
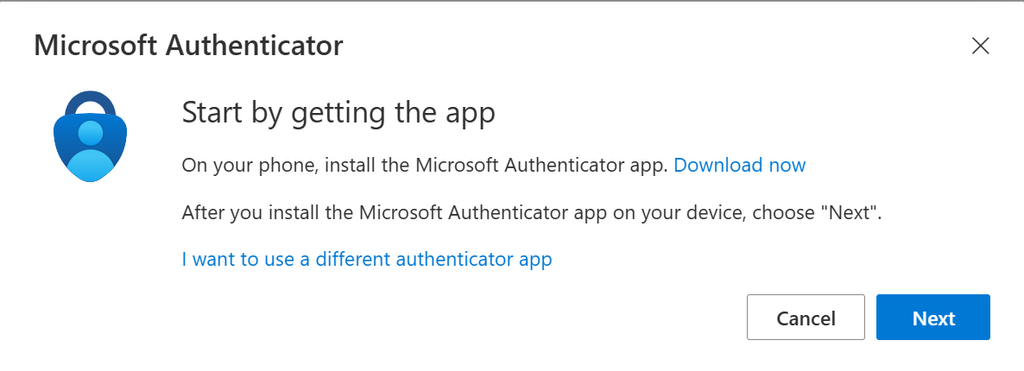
Step 3
Click "Next" on the screen shown below.
DO NOT download the Microsoft Authenticator app at this step to avoid confusion.
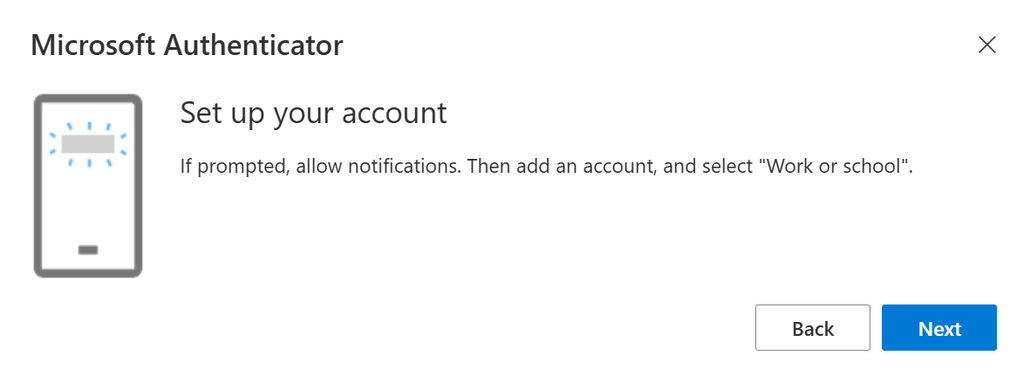
Step 4
Click "Next" on the screen shown below.
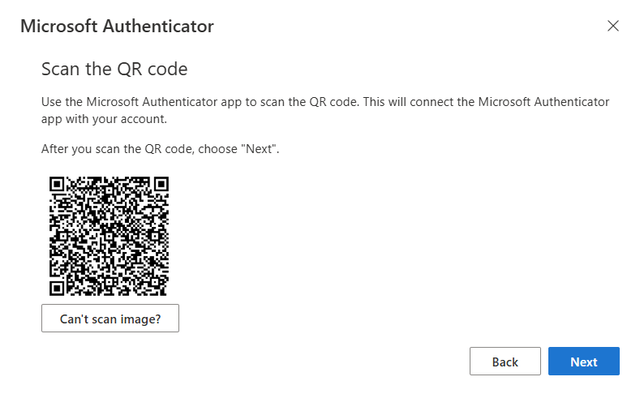
Step 5
You will be presented with a QR code. Do not click on anything on this screen yet.

Step 6
Download and install the Microsoft Authenticator App from Google Play on your mobile device.
Step 7
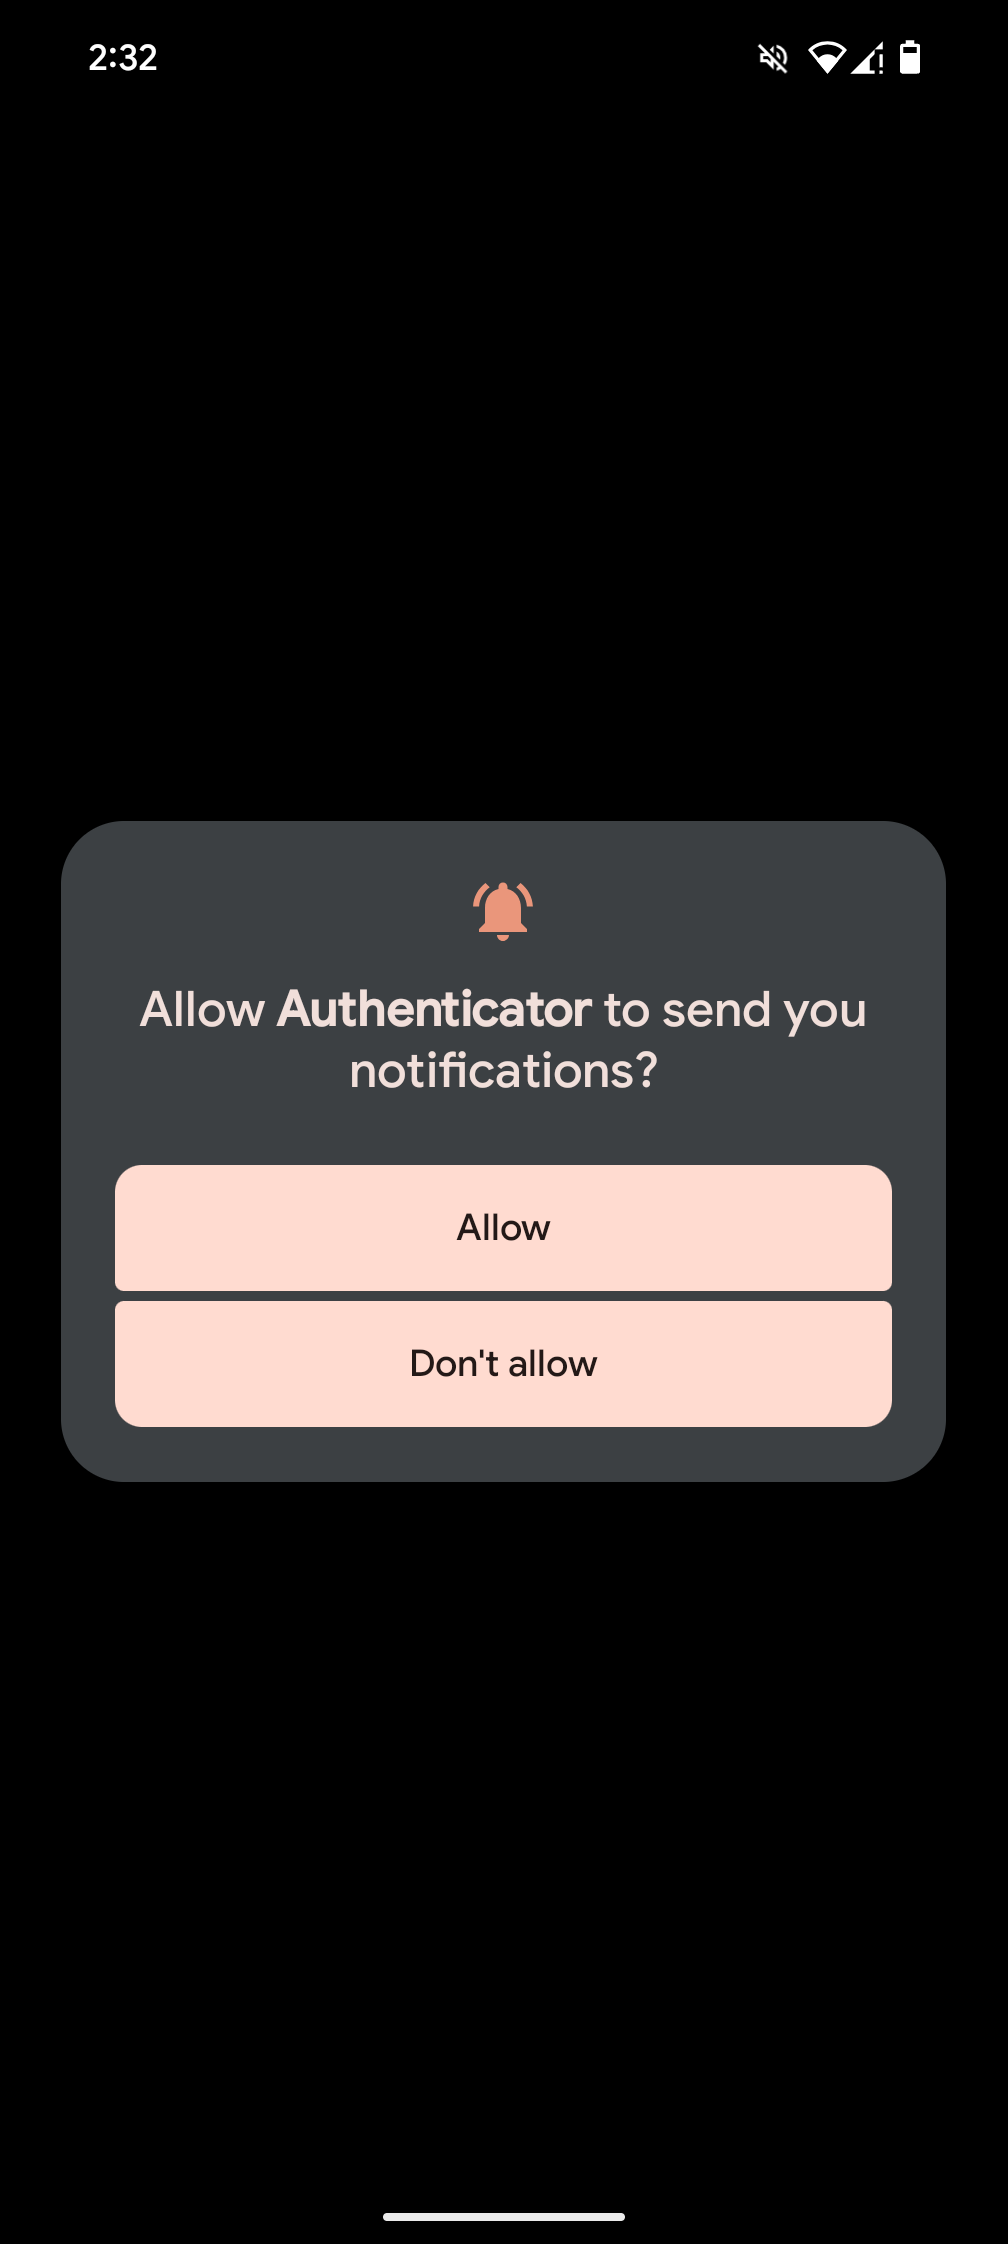
If prompted, select Allow notifications.
Step 8
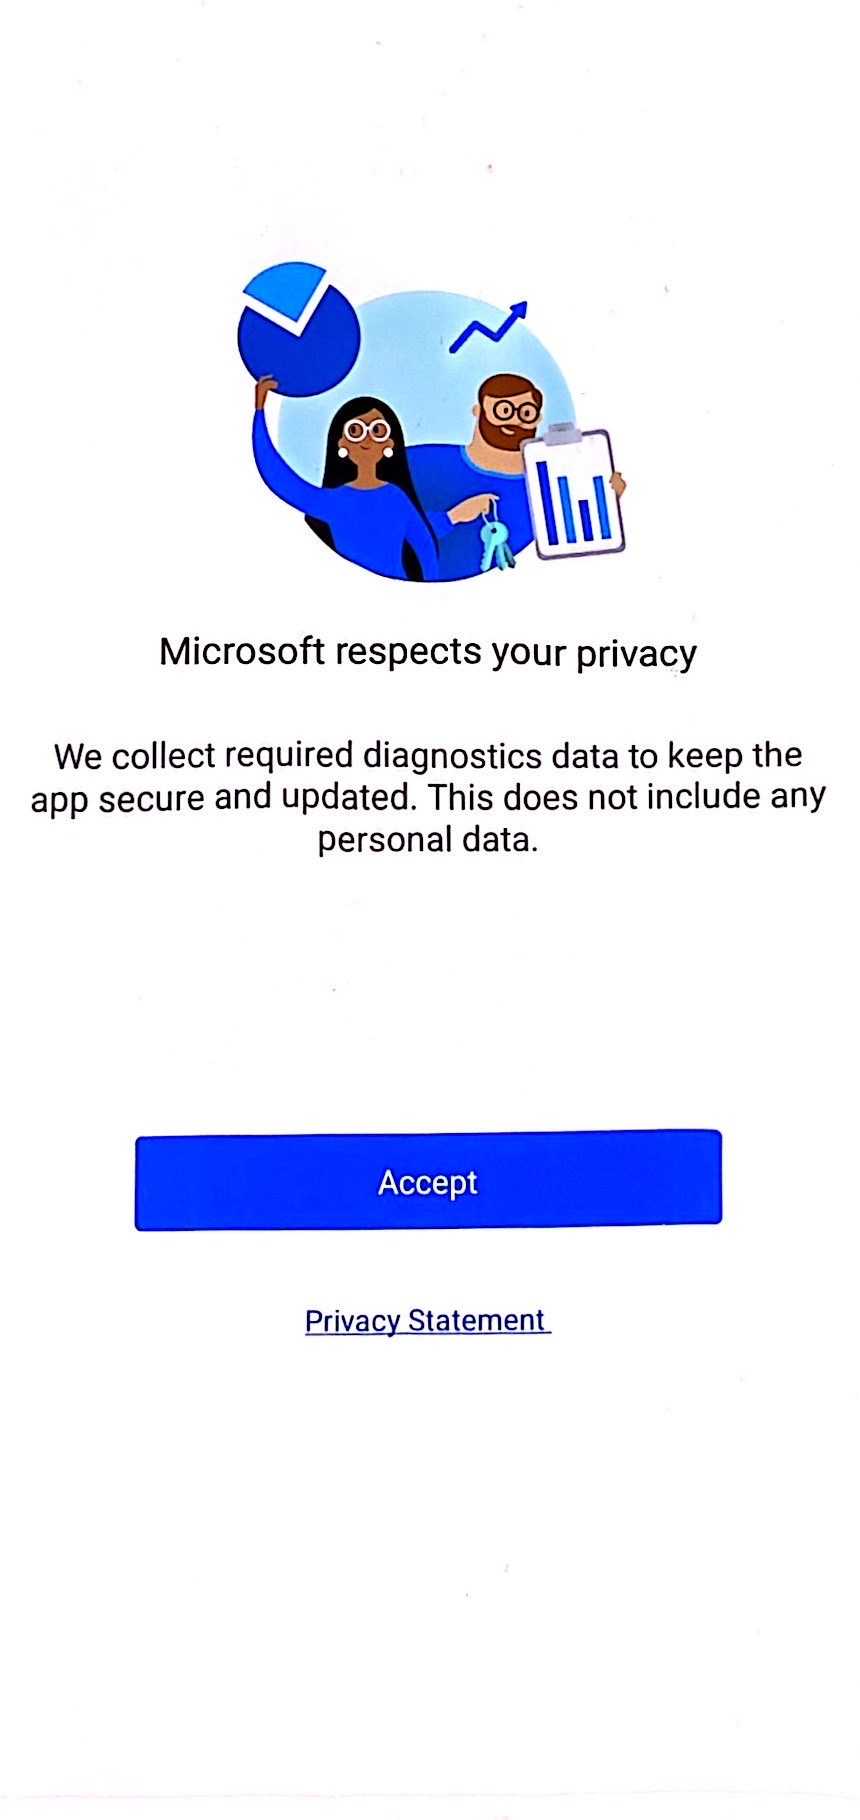
Click through the following screens on your Microsoft Authenticator app.
- Select "Accept”
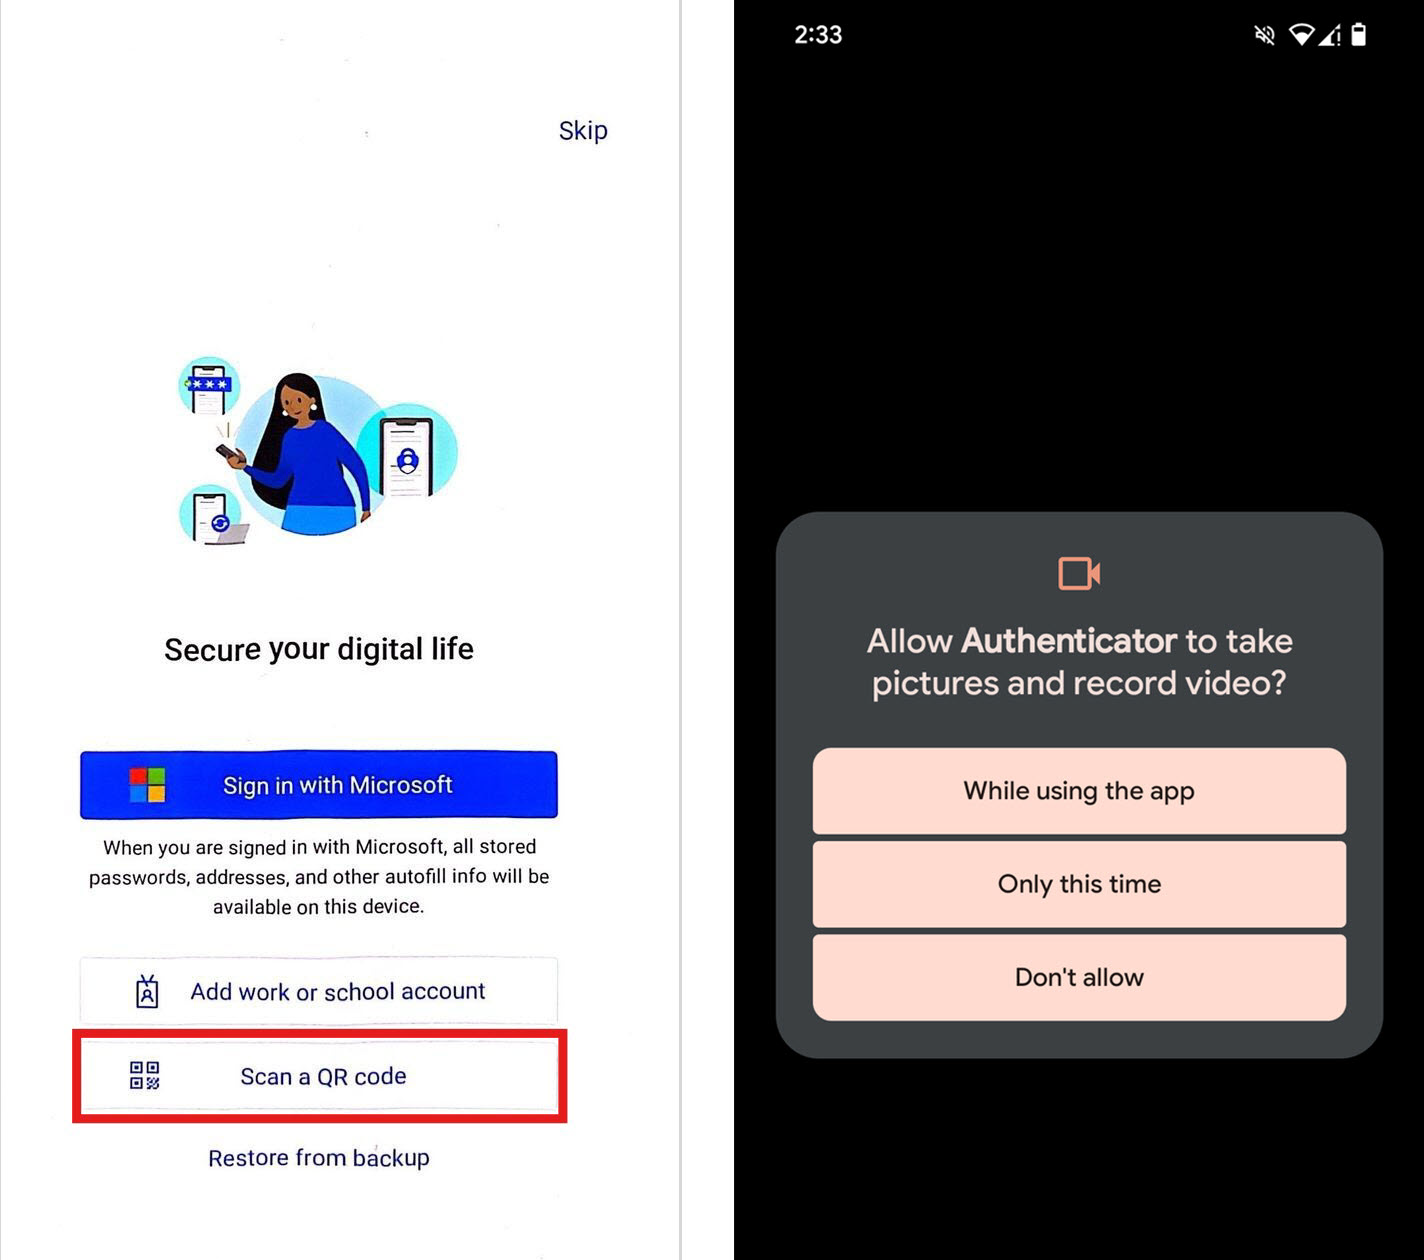
- Select ‘Continue’. You do not have to check the box.

- Proceed with caution and DO NOT select ‘Sign in with Microsoft’ as doing so will cause errors in the setup process.
- Stop at the screen that says ‘Scan a QR code’.
- Click ‘Scan a QR code’
- Select one of the options presented to Allow the app to use your camera
Step 9
Using your mobile device, scan the QR code being presented on the web page on your computer.

Step 10
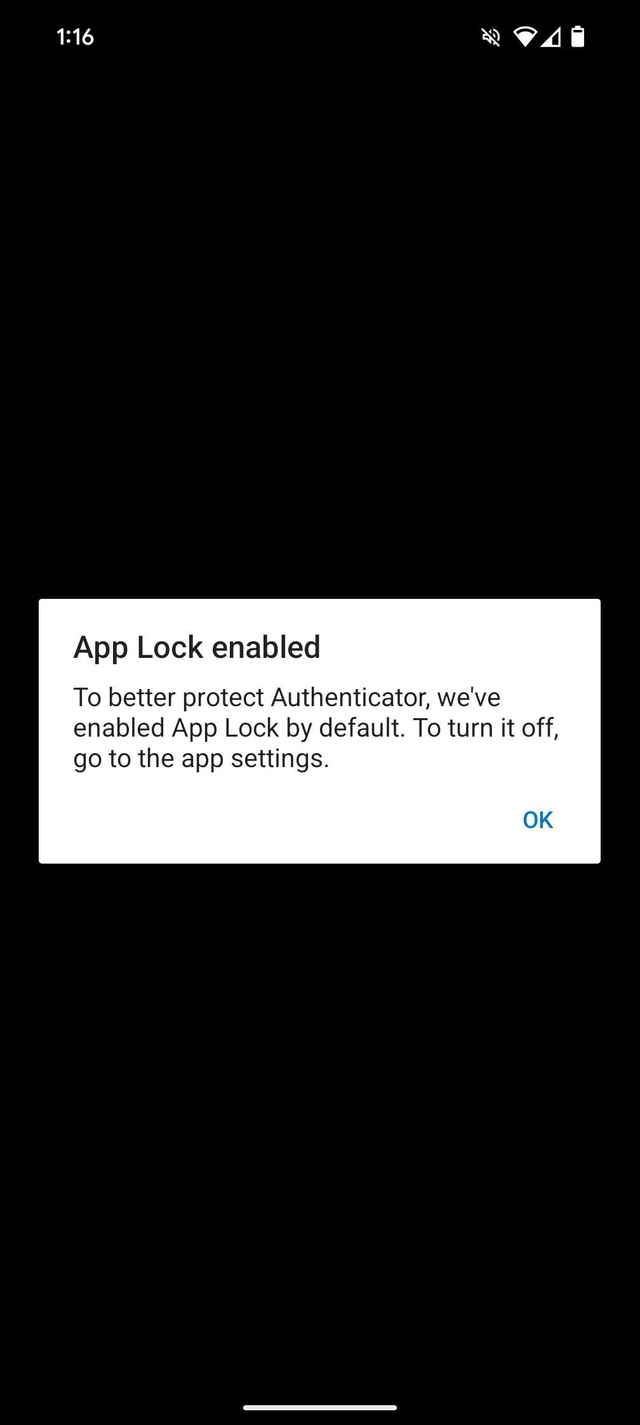
Once your mobile device has scanned the QR code, you will see a screen saying ‘Activating, please wait’. Then, you will see a message saying “Account added successfully'.
If prompted for App Lock enabled, click ‘OK.’

Step 11
Click ‘Next.’ on your computer after scanning the QR code.
Step 12
You will be presented with a 2 digit code on your computer.
Enter the code on your mobile device. Select ‘YES'
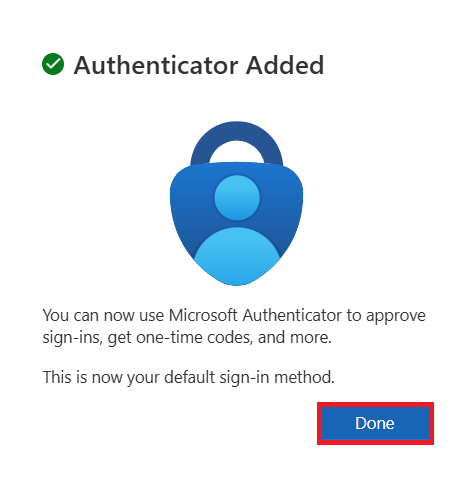
Step 13
Success! You will see a message saying ‘Authenticator Added’ on your computer. Click ‘Done’.
Step 14
On your mobile device, confirm that your work account is set up.

Step 15
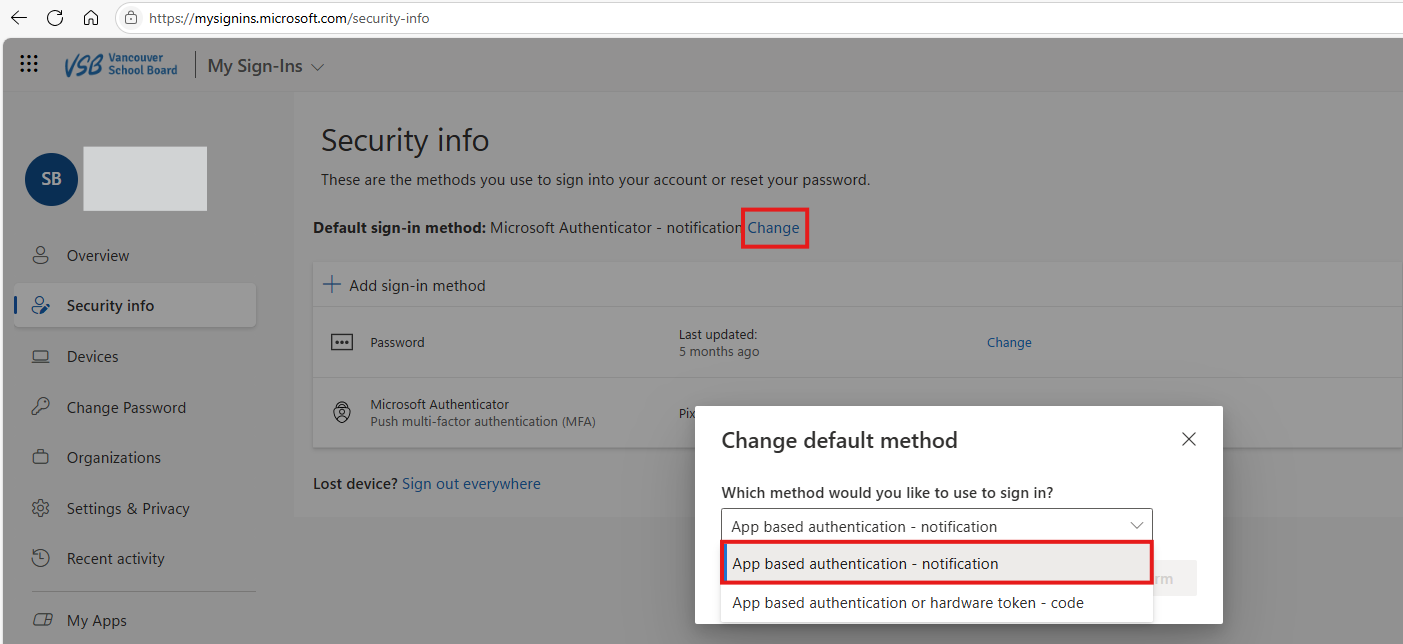
Final step. On the My Sign-Ins page, please verify that the Microsoft Authenticator app is set as your default sign in method.
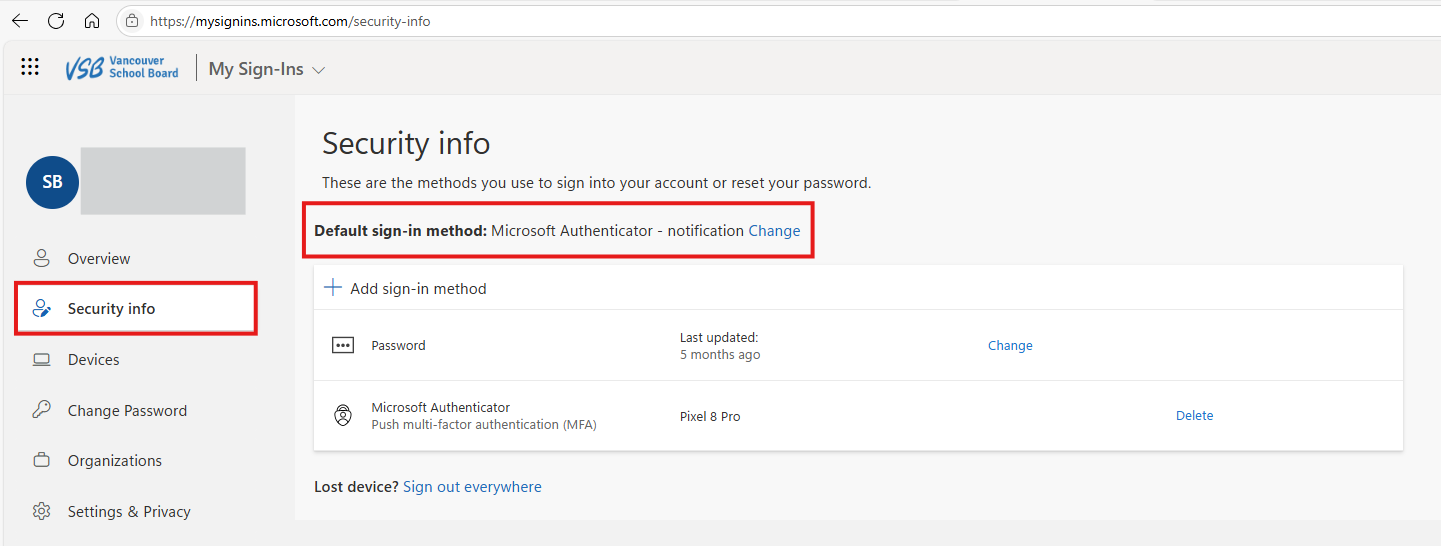
If it's not your default sign-in method, click 'Change' and choose 'App based authentication – notification' from the dropdown.
NOTE: On your first day using the new system, you'll see quite a few pop-ups as everything syncs up. Once that's done, you'll only get pop-ups now and then to authenticate. If you run into any issues during the authentication process, just reach out to the VSB Service Desk.
Need help? We are here to support you
For any questions related to multi-factor authentication, please call the VSB Service Desk at +1-604-713-4444 or email at servicedesk@vsb.bc.ca.